Spring源码-@Scheduled注解
在熟悉Spring中Bean启动流程后,知晓@Scheduled的原理不难。但是,这次debug并不简单…
一 @Scheduled原理
古老项目启动很拉胯,速度太慢严重营销效率。直接建一个新项目分析源码
直接点到@EnableScheduling注解里面看
1 |
|
其中引入了SchedulingConfiguration类,再进
1 |
|
关键类及关键方法 :
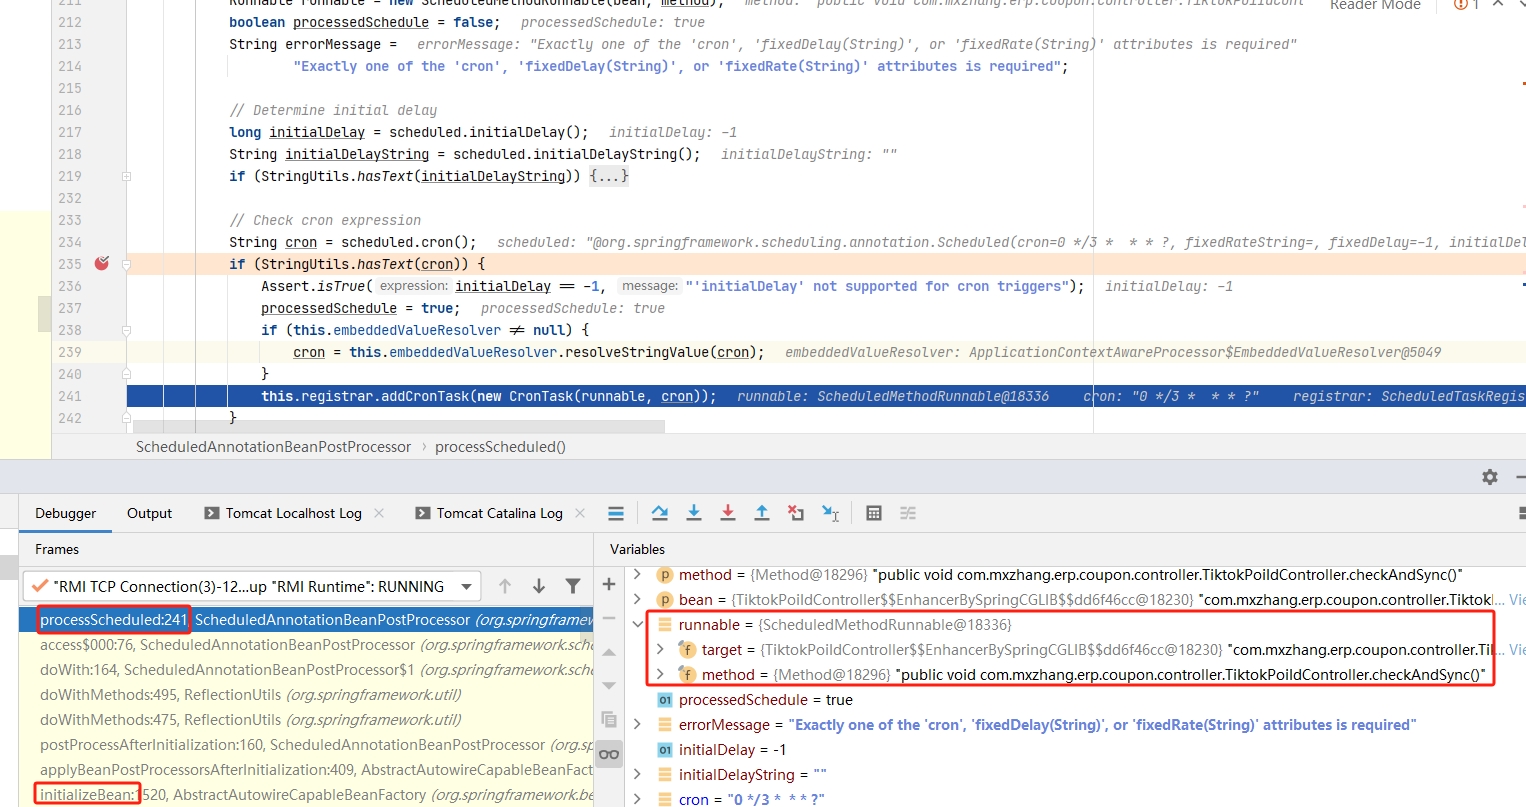
ScheduledAnnotationBeanPostProcessor,显然是一个BeanPostProcessor(bean后置处理器,重载方法: postProcessAfterInitialization),同时它实现了ApplicationListener<ContextRefreshedEvent>。在SpringContext完成后会有个onApplicationEvent回调动作。
大概看一下这两个方法postProcessAfterInitialization和onApplicationEvent。postProcessAfterInitialization方法,其实就是在每个Bean初始化阶段,对Bean中方法注解进行扫描,如果有@Scheduled注解,那么就把它封装成一个Runnable注册到一个Set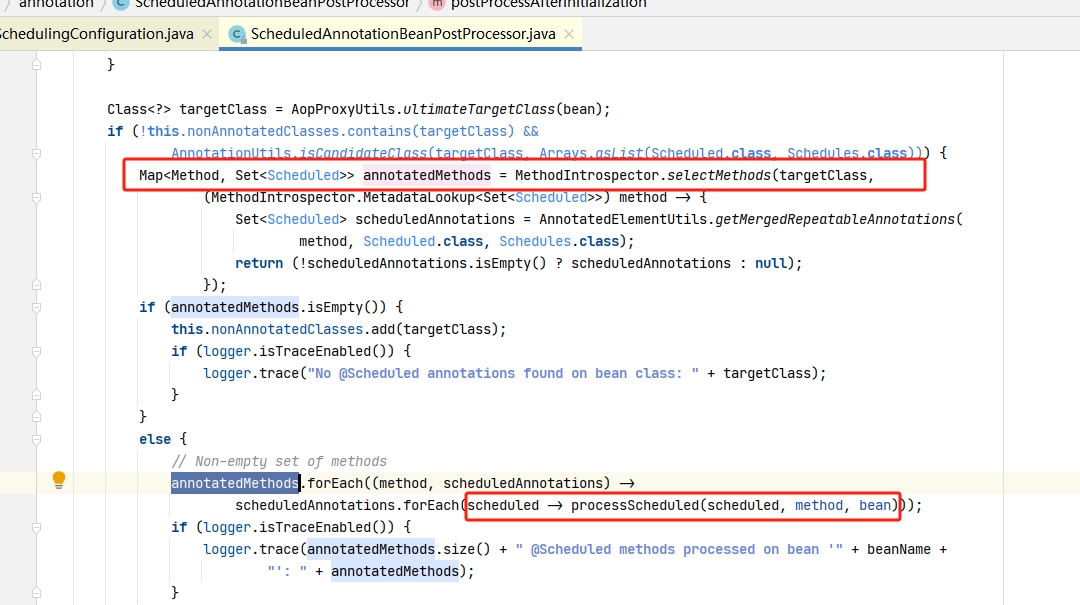
注册方法调用栈: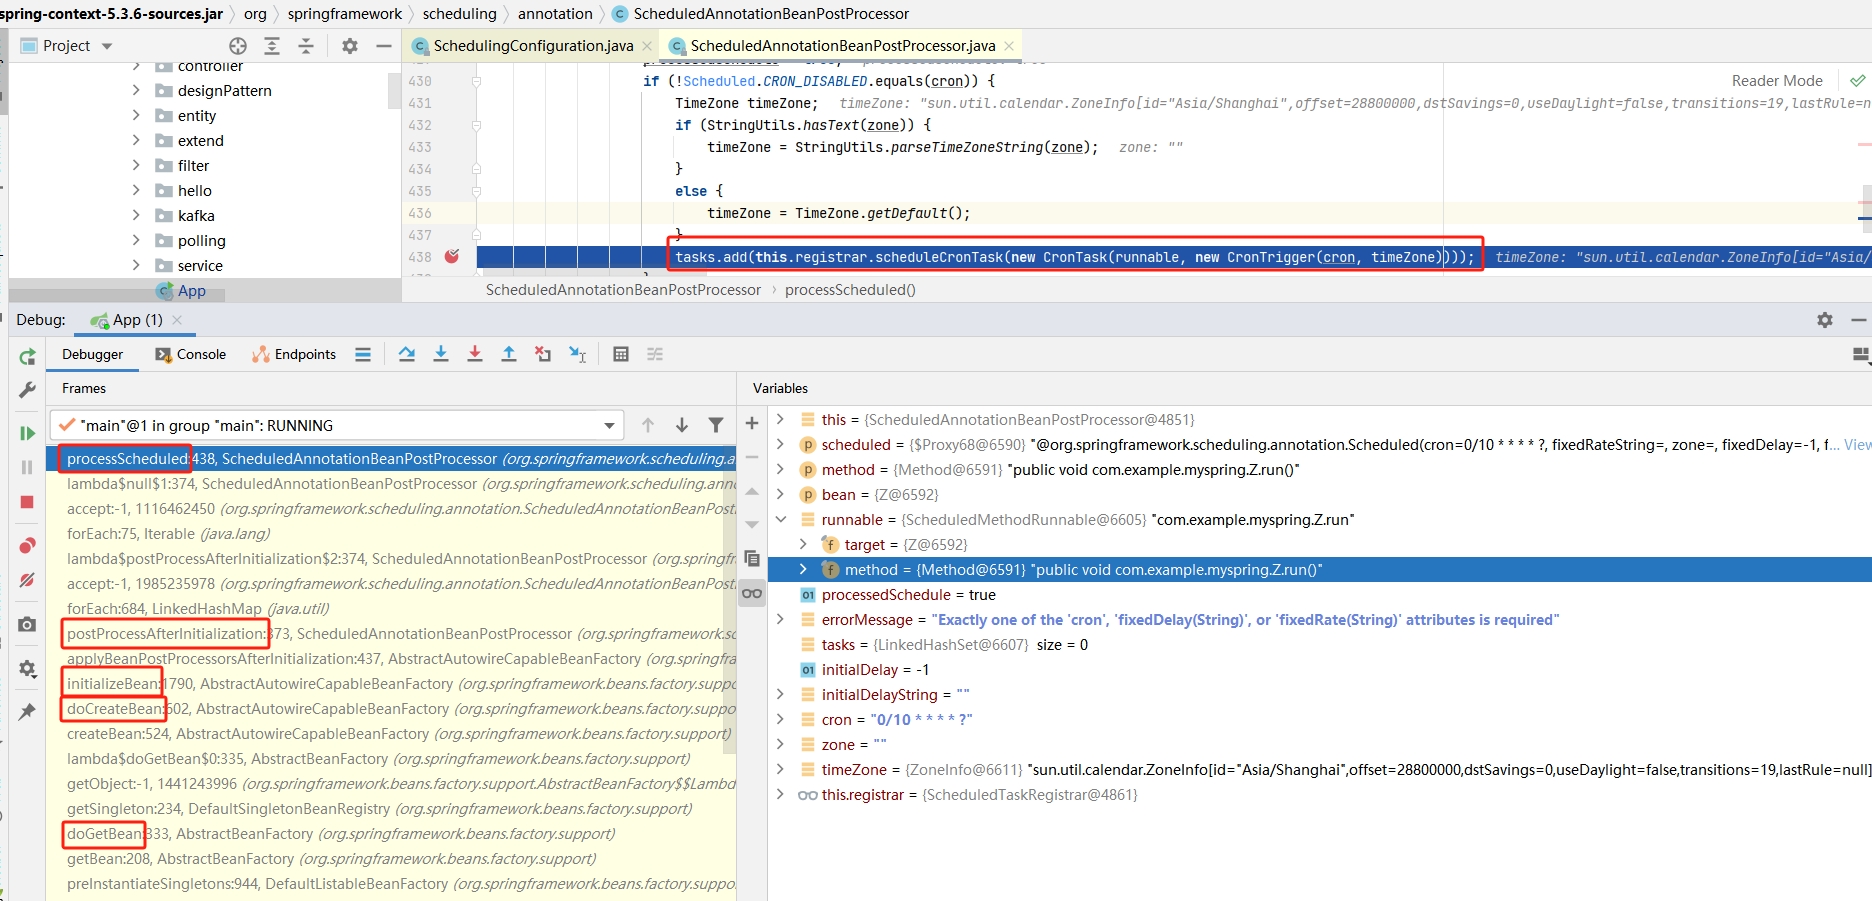
而onApplicationEvent方法恰恰就是从之前那个Set里面取下一次触发时间和执行方法体作为一个延迟任务丢到线程池中执行: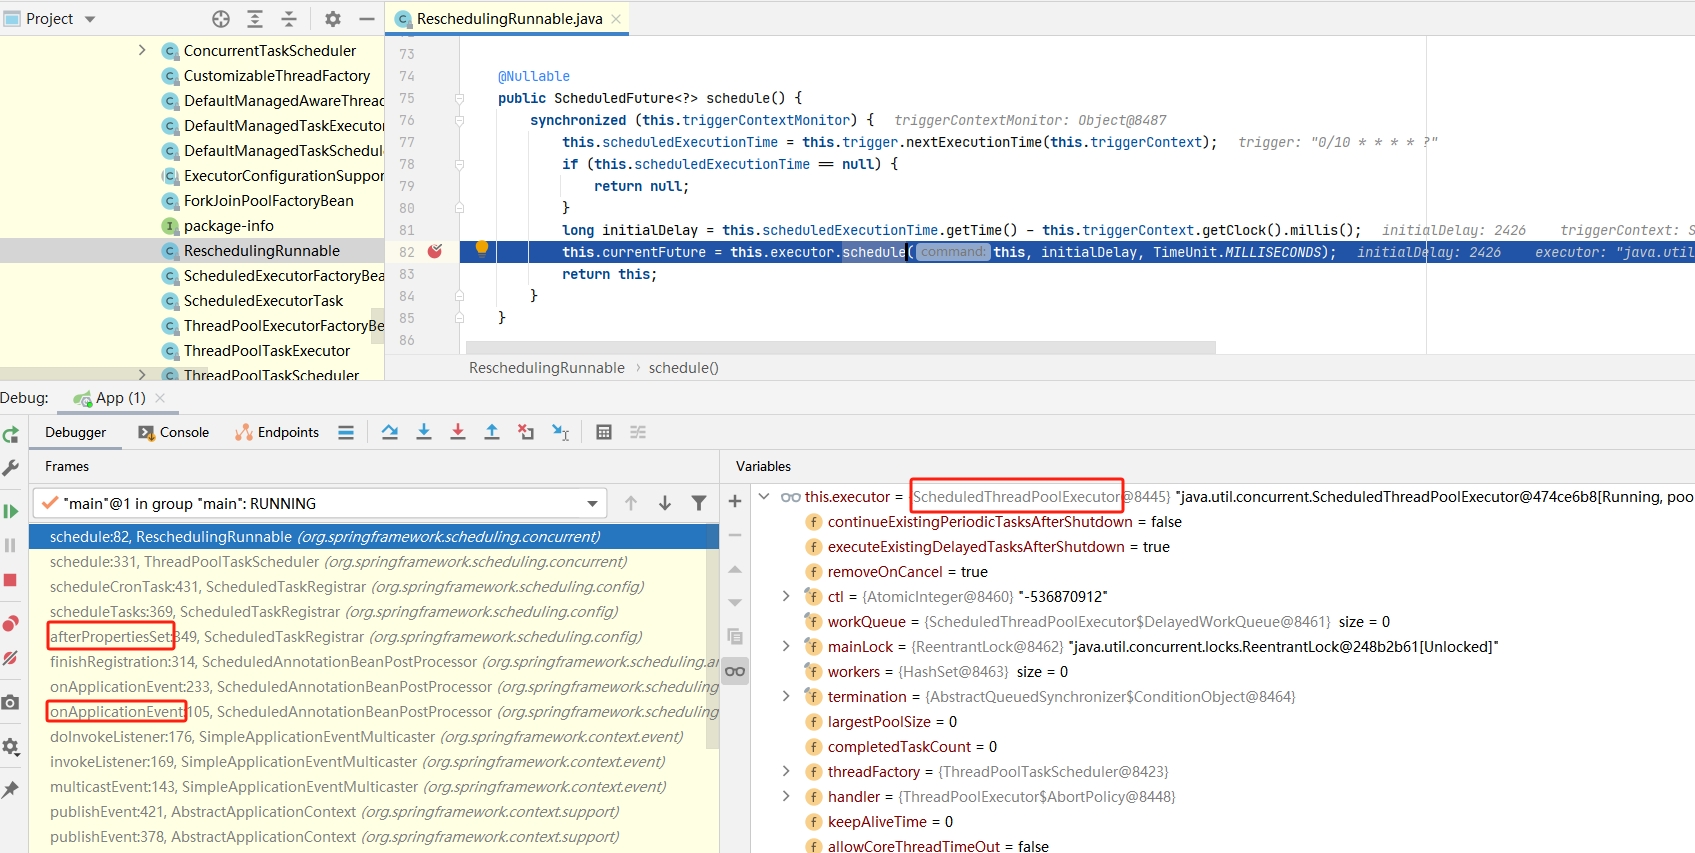
二 Spring3中@Scheduled注解失效原因
2.1 先跟进一下一个正常的单例Bean
基本和Spring3.2是一致的, 大致是先注册,后执行:
1 | 注册: |
- Bean初始化的时候进入ScheduledAnnotationBeanPostProcessor
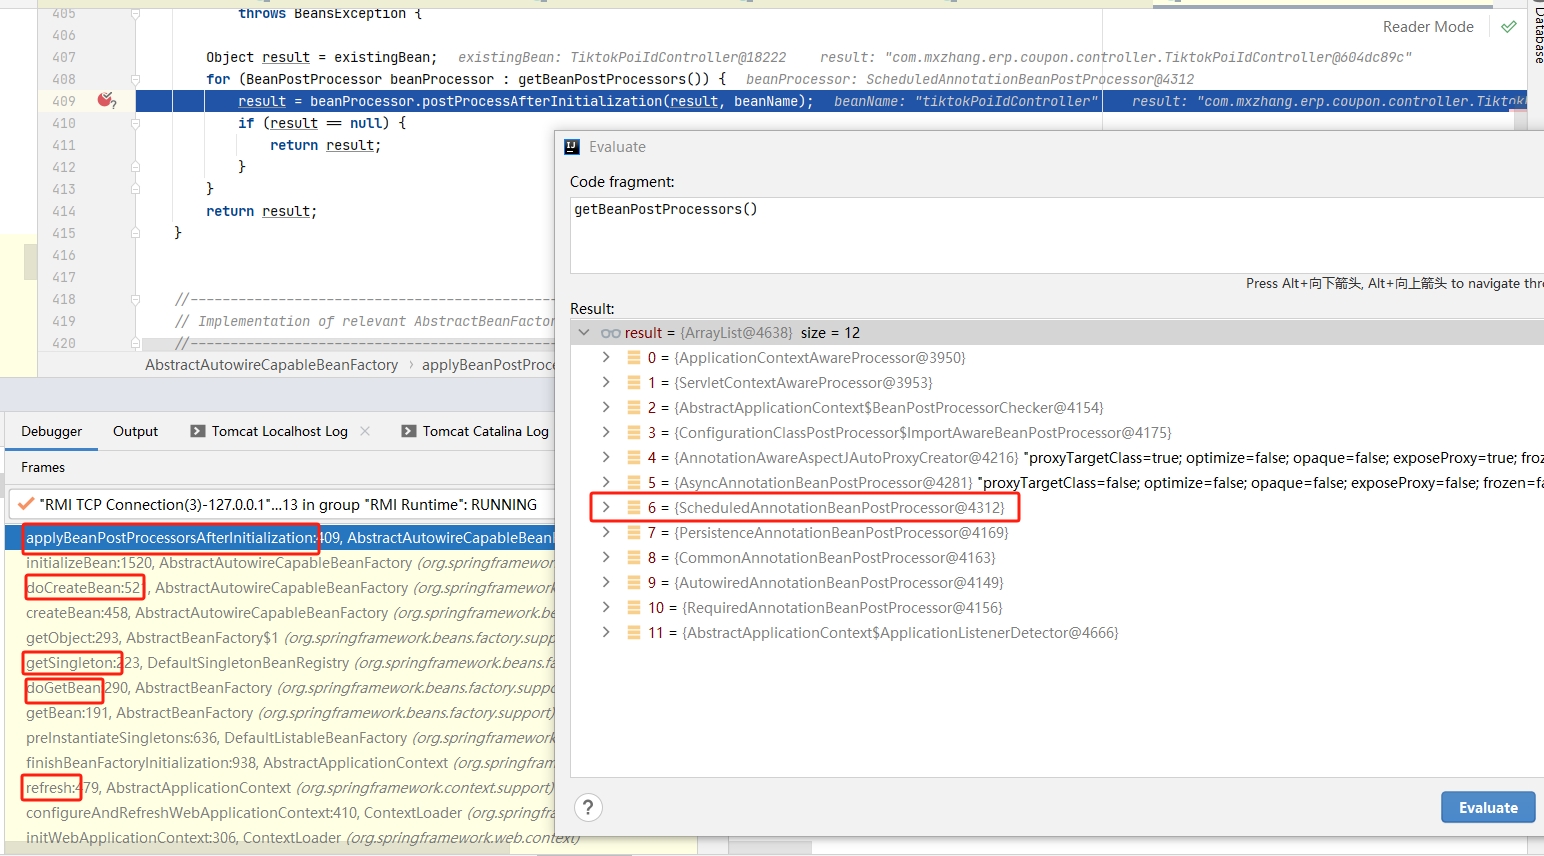
- 通过Bean后置处理器中的processScheduled完成注册
2.2 @Scope(“prototype”)的Bean
从任务启动的位置肯定是看不出毛病的。 那么,跟一下用修饰为原型的Bean的注册流程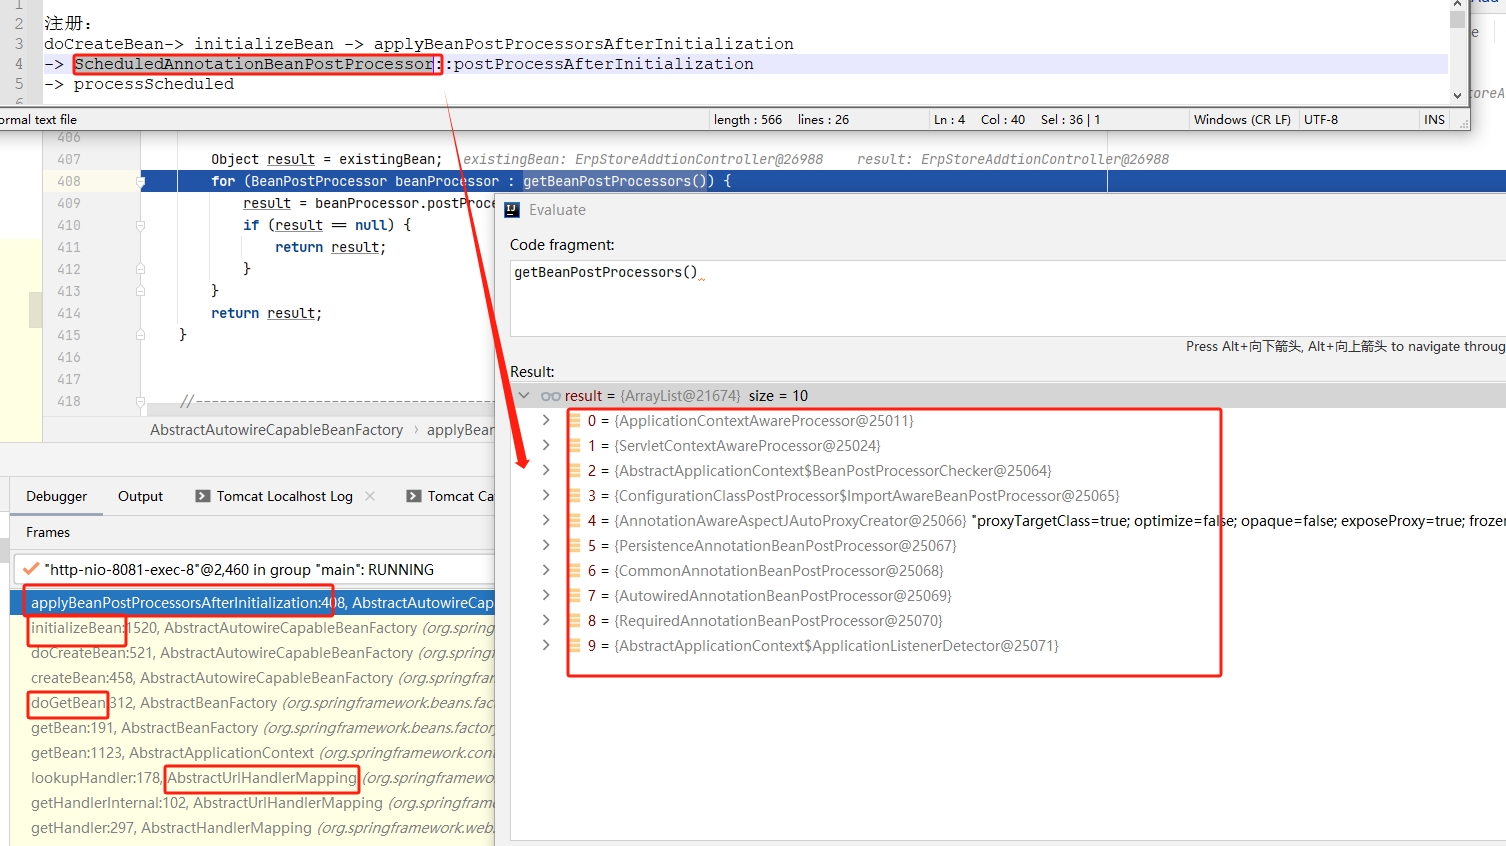
这里,Bean的后置初始化阶段,居然没有关键的ScheduledAnnotationBeanPostProcessor。那么肯定是无法像单例Bean一样把任务注册到内部Set的。
三 总结
- ScheduledAnnotationBeanPostProcessor是@Scheduled的核心类,注册任务和执行任务的方法都封装其中
- @Scope(“prototype”)的作用是每次需要Bean都会重新创建,而创建的时候是每次getBean()的时候!!!也就是说,如果这个Bean不会被用到,就根本不会被创建。即使在SpringContext启动后,这个Bean被BeanFactory创建,但是初始化的时候是没有关键的Bean后置处理器ScheduledAnnotationBeanPostProcessor的。这就是@Scheduled不生效的原因。
- @Scope(“prototype”)修饰的Bean不会纳入Bean的生命周期管理
四 暗藏玄机
虽然知道注解不生效的原因是ScheduledAnnotationBeanPostProcessor没有被BeanFactory加载,但是我仍不明白为啥在BeanFactory启动的时候,单例Bean可以获取到这个后置处理器,但启动后getBean的时候却没有了
4.1 SpringMVC多上下文
由于需要跟进BeanPostProcessor的加载,我在AbstractApplicationContext中断点了registerBeanPostProcessors方法。
却发现它居然进去了两次!!!
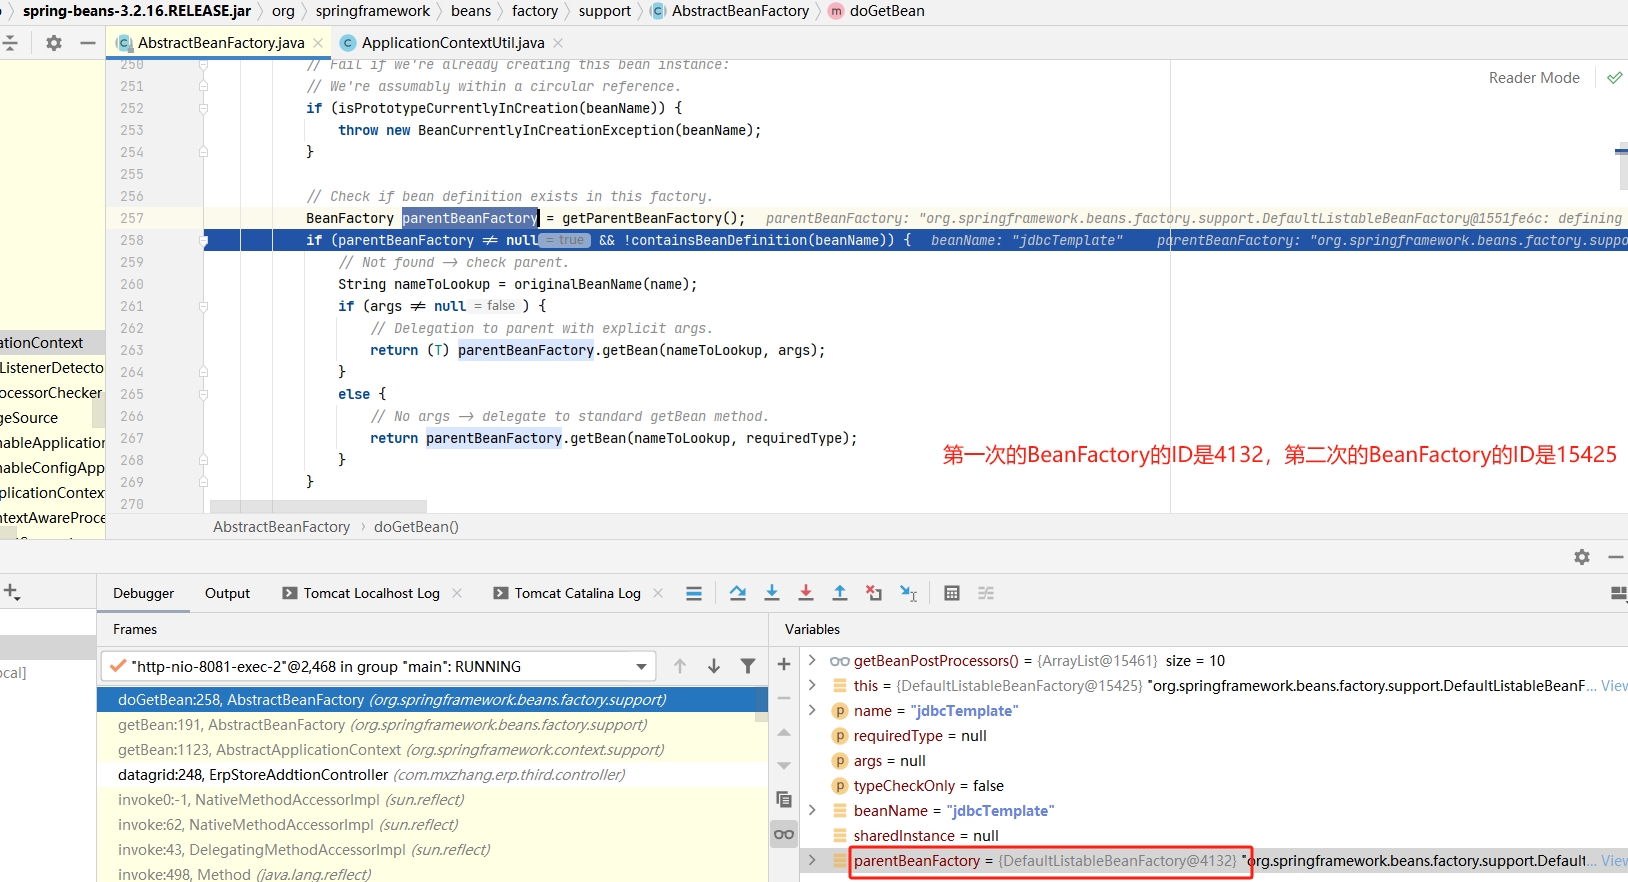
原来是tomcat中SpringFrameworkServelet还会触发一次refresh,因此,实际上会产生两个Spring容器(上下文):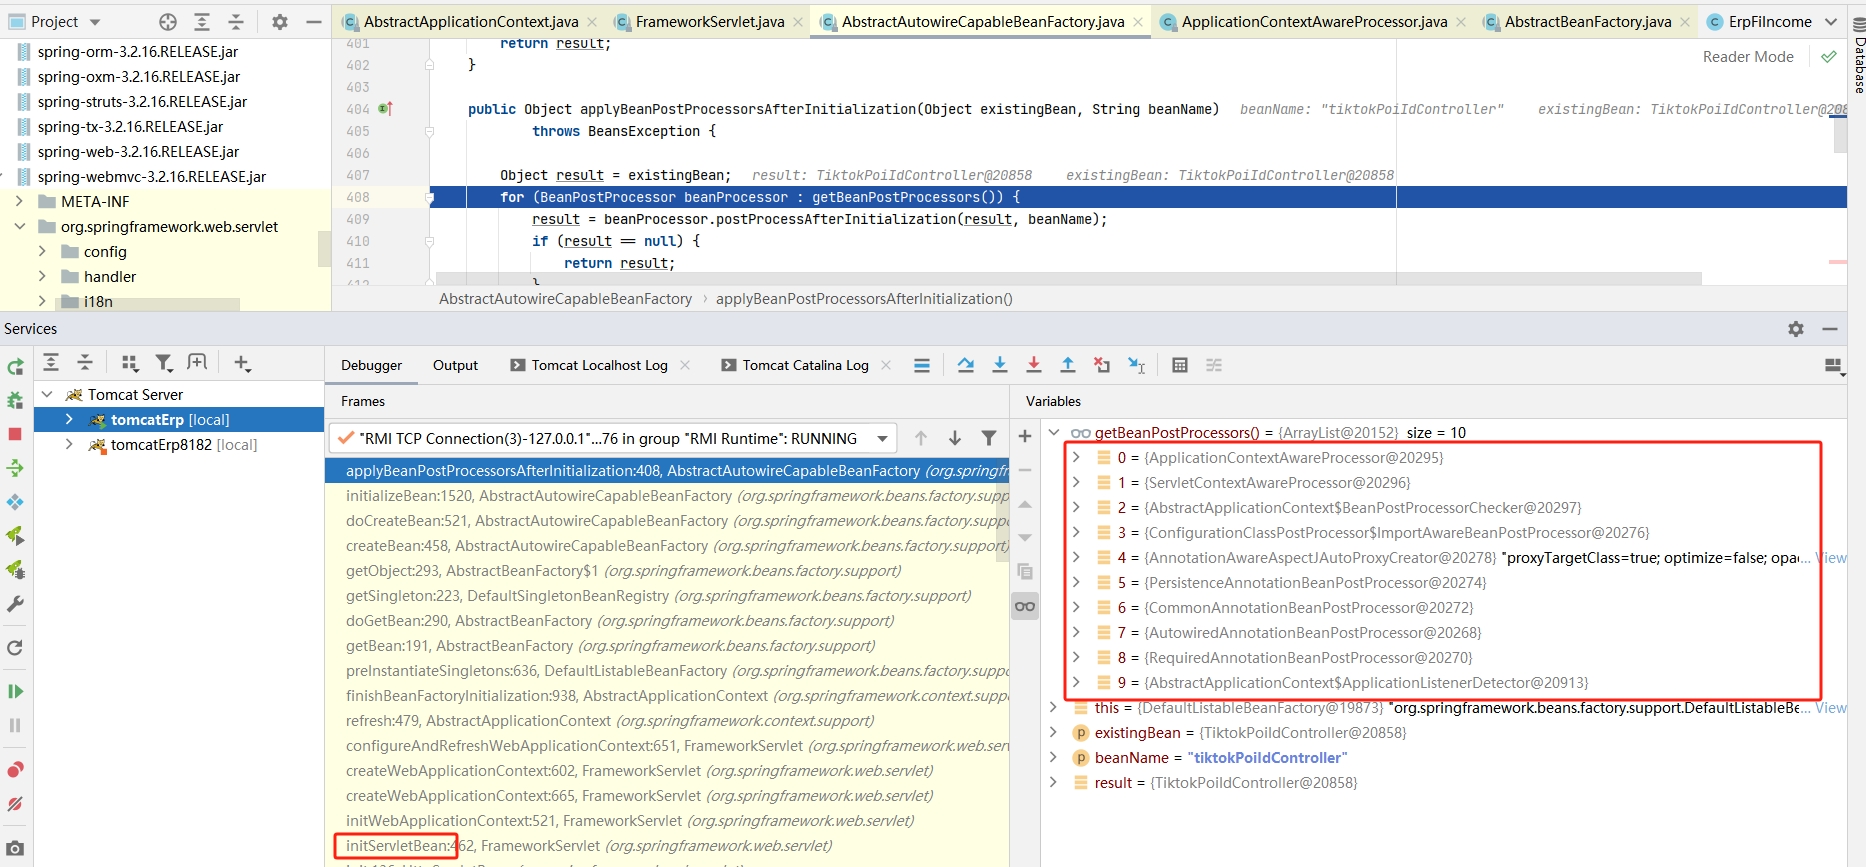
实际debug跟进的时候发现,类型没变,但是BeanFactory的引用变了!!实际引用过程如下:
1. BeanFactory加载对应BeanPostProcessor
org.springframework.beans.factory.support.DefaultListableBeanFactory@28ebddfd: defining beans

2. BeanFactory初始化Bean
org.springframework.beans.factory.support.DefaultListableBeanFactory@28ebddfd: defining beans

3. FrameworkServlet触发initWebApplicationContext,再次refresh
org.springframework.beans.factory.support.DefaultListableBeanFactory@427cfb6a: defining beans

4. 再次进入Bean初始化
org.springframework.beans.factory.support.DefaultListableBeanFactory@427cfb6a: defining beans

5. FrameworkServlet中getBean()(@Scope("prototype")修饰的Bean)
org.springframework.beans.factory.support.DefaultListableBeanFactory@427cfb6a: defining beans
在跟进为什么第二次refresh,获取不到关键Bean后置问题的时候,找到了加载关键Bean的位置:
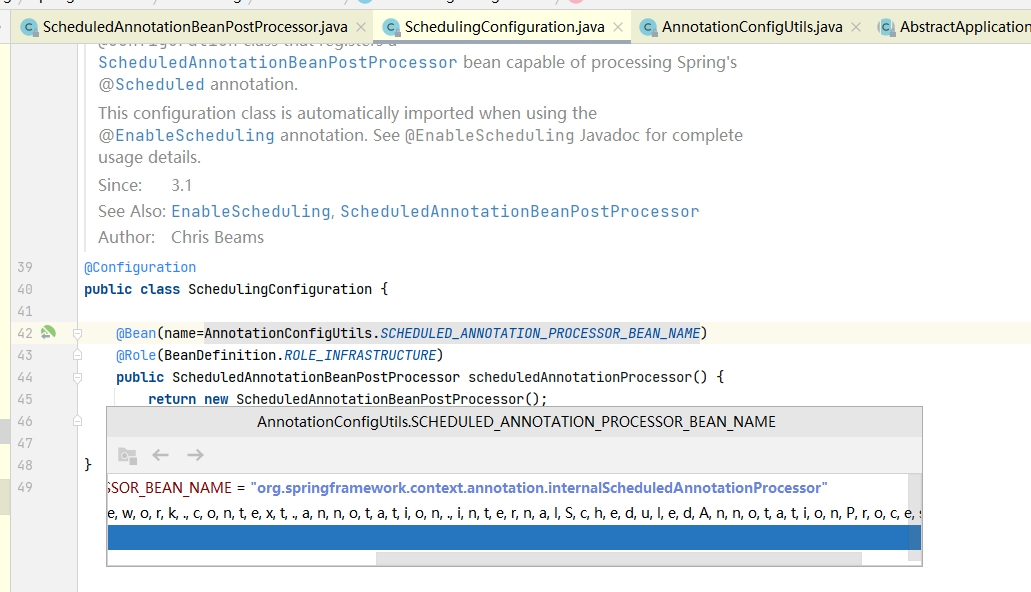
需要注意的是,关键Bean后置的名称并不是默认的类名首字母小写,而是(如果注意不到这点,很容易判断出错):org.springframework.context.annotation.internalScheduledAnnotationProcessor
这里发现:第二次refresh的时候,BeanDefinition中压根就没有关键Bean的信息。到了这里,回溯项目配置文件,spring-task确实是单独出1个xml文件,而web.xml中Servelet配置的配置文件确实只有spring-mvc.xml的。故而,第二次加载,就只有这个xml中配置的Bean的信息。这里捋一下:第一次refresh中有全部Bean的信息,第二次只有部分Bean的信息,故而第二次在Bean初始化的时候没有获取到ScheduledAnnotationBeanPostProcessor。
但是!!!我们项目一般会把ApplicationContext注入到一个自定义Bean,为了方便获取BeanFactory里面的Bean。既然二次refresh会导致第二次的ApplicationContext中的Bean信息只有部分,而为什么项目中寻找其他xml中的类没有报错呢?!!
原因:由于SpringMvc中多上下文的原因,Bean的加载设计为类似类的双亲加载模式。当前上下文没有的时候,会到父上下文中获取:
问题既然分析清楚了,那么解决ScheduledAnnotationBeanPostProcessor的办法也很简单:
 1. 将spring-task的配置放到spring-mvc.xml中
 2. 将web.xml配置的第二个上下文的配置文件补充完成,可用类似`classpath:spring-*.xml`
4.2 版本差异
由于Spring3版本的服务启动实在费时间,很多时候跟进源码都是直接通过新启动的Springboot服务来跟进的。 但是我却发现,Spring5中用@Scope(“prototype”)的Bean中的@Scheduled注解可以生效!!
对比了下ScheduledAnnotationBeanPostProcessor中的后置方法后,发现了Spring3仅仅只是加入到Register的List,而Spring5中却实实在在的将其加入到执行线程池了。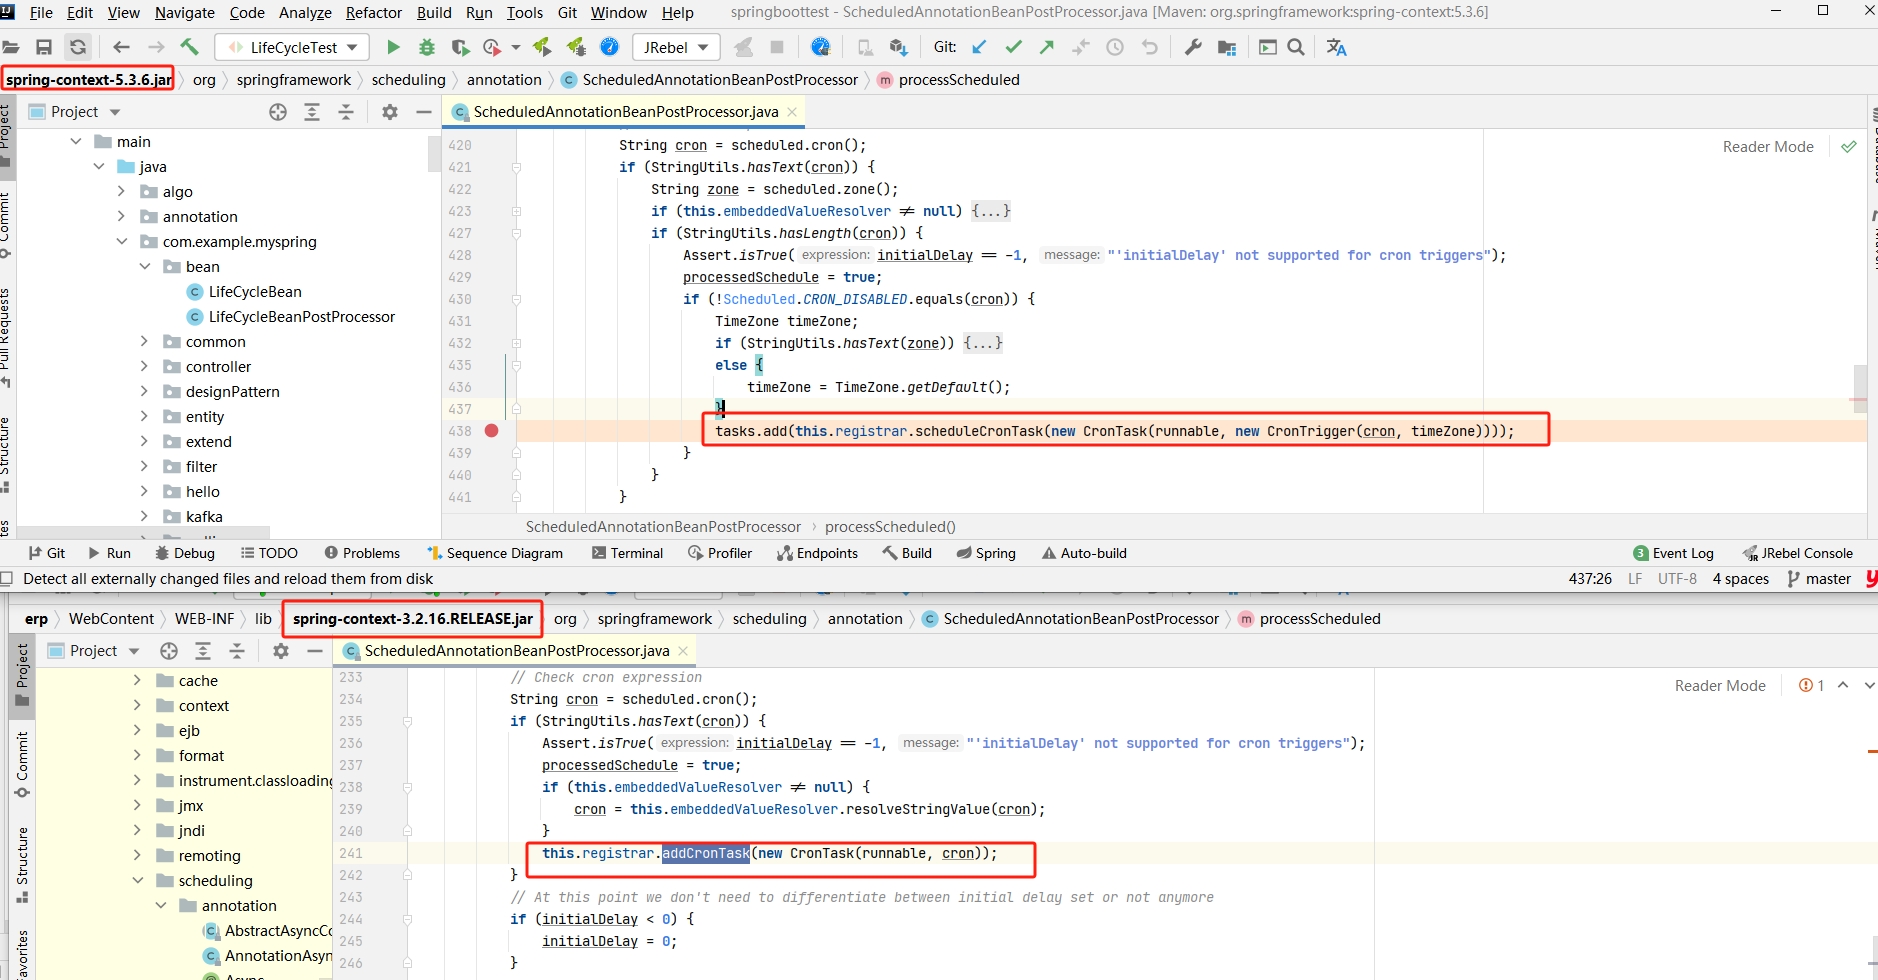
因此,即使在Spring3中将ScheduledAnnotationBeanPostProcessor处理器加载到新的Spring上下文中,也是无法让原型Bean的定时任务执行。